
IBM 300PL 656x Information and Software
System Type: 6562 / 6592
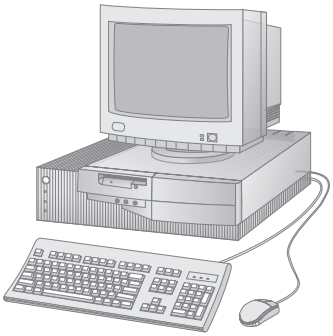
The best of the PC 300 series in terms of features and practicality on Windows 9x and OS/2 WARP. Model 6562 came in a desktop format, and 6592 (less common) came in a tower format, and hosted more PCI and ISA slots on the riser card. These two were the only ones in the PC 300 series to sport a front audio panel (later removed, presumably due to the fact it was difficult to slide the case back on and match it to the volume knob-- or in worst case situations, the PCB was bent downwards as the unsuspecting individual tried sliding the top back on). Sliding back on the case has more difficulties than just making sure the front audio panel lines up properly: the rear plastic tabs have to catch underneath the metal to secure on properly. However, 99% of all 300PLs *never* have these cases slid back on properly causing the rear plastic tabs to be pushed together and deforming the case. Even on IBM's own 300PLs the technicians never put the case back on properly!
Drivers and Downloads
--> Installing Options in Your Personal Computer
--> Using Your Personal Computer
--> Technical Information Manual
--> BIOS 25a (latest version)
--> Diagnostics Diskette
--> Crystal Audio (Windows 9x)
--> Intel Ethernet PRO/100 (Windows 9x)
--> Matrox Mystique Video (Windows 9x)
-----> PowerLeap PL-K6-III manual
--> K6DOS.SYS utility (Windows 9x)
--> GUI-based utility for K6 management (Windows 9x)
Hardware Specifications
These 300PLs feature a socket 7 Pentium MMX processor and the Triton II chipset. A very high-end chipset at the time aimed for businesses and the professional market. Here's a quick excerpt taken from the manual regarding the chipset:
PC 300PL computers use the second-generation Intel 82430HX chip set, which consists of two modules. The 324-pin TXC module provides a bridge between the PCI bus and the microprocessor bus. (For information on the PCI bus, see "PCI-to-ISA Bridge" on page 8.) The TXC module also controls the cache and system memory interfaces.
The 208-pin, PIIX3 module provides a bridge between the PCI and ISA buses. The module, which is fully compliant with PCI Local Bus Specification (Version 2.1), also contains the IDE and USB controllers.
The system memory interface in PC 300PL computers is controlled by the Intel TXC chip set module.
(Refer to "Chip Set Control" on page 6 for information on the TXC module.) There are three dual inline memory module (DIMM) sockets on the system board. The DIMM sockets are powered by +3.3 volts. This voltage allows for low-power operation and supports 64-Mbit technology. For DIMM socket pin assignments, refer to "System Memory Connectors" on page 43.
The system board supports:
* A total of 384 MB of system memory
* A maximum of 128 MB of system memory in each DIMM socket
Any configuration of DIMMs is acceptable. However, DIMMs must have the following characteristics:
* Must be EDO nonparity (NP) or EDO error correcting code (ECC) DRAMs
* Must be 16, 32, 64, or 128 MB in size
* Must be 168-pin, unbuffered, +3 V, serial PD type
* Must have gold-lead tabs
* Must have 60 ns access speed only
Also, note the following:
* EDO NP modules and EDO ECC modules can be mixed, but they will configure as NP.
* To enable ECC, all installed memory must be of the EDO ECC type.
Note: Single inline memory modules (SIMMs) are not supported in PC 300PL computers.
Triton II attempted to fix up disadvantages of the Triton I chipset... the Triton II actually did this pretty well and supports 512 MB of RAM! Very good for 1997. However, IBM only put three RAM slots, so a total of 384 MB only physically possible. Even worse, IBM didn't use an 11-bit cache tag, so these systems will take a huge performance penalty as the memory exceeds past 64MB. There is a way to bypass the cache limitation by using an upgrade socket with an onboard voltage converter that can support a K6-II+ or a K6-III / III+. The later K6 chips have their own on-die cache that bypasses the problematic intel cache. The fastest you'll get out of the 300PL with its older Socket 7 design is 400 Mhz; you may be able to overclock the FSB and use a K6 that supports 450 Mhz (75/6.0x), however that will be experimental and the system may not run stable.
In regards to the power button, it's an early version of "soft power", where the power is controlled by software on the 5v standby line. This revision of soft power allows you to crash the machine without having to hold the power button down, but also will turn itself off automatically when an OS tells it to do so. Later 300PLs after the Pentium 1 models implemented the common soft power we know today: where you must hold the power down for a few seconds before the machine can be crashed. Documentation on these early soft power modes is long forgotten and something history will soon forget (in fact, most people don't know the early soft power implementations behaved more like hard power).
The internal IDE controller is limited to addressing a maximum of 8GB of space: if you need to go beyond that, you will have to use a PCI controller. The fastest (stock) processor available to the machine is a 233Mhz Pentium 1; although when inverting the DIP switches for the 233 mode, throws it into 50Mhz. So it may be possible to modify the clock speed in that undocumented mode. As mentioned previously you can't go beyond 400 Mhz. When using an upgrade adapter it will bypass the 300PL's manual DIP switches (I just leave it on the 233 Mhz mode, but you could even leave it on an undocumented mode and it wouldn't matter').
K6-III CPU Upgrade
The PowerLeap PL-K6-III offers to be one of the better solutions for utilizing a K6-III / K6-II+ in an original Socket 7 system. It's capable of supplying many different voltages that most sockets don't do (and most upgrade sockets for that matter). **BEFORE YOU UPGRADE THE 300PL TO USE A K6-III, ENSURE YOU INSTALL THE LATEST 25a BIOS THAT ENABLES AMD CPU SUPPORT***. Once installed in the 300PL, the easiest method of reattaching the heatsink is with the use of thermal glue; the stock heatsink that comes with the adapter is pretty horrible.
Before installing the PL-K6-III you will need to ensure the jumpers are set correctly for the K6-III, here are the following settings as from the PowerLeap manual:
K6-III 400 (66 or 75/6.0x) 1:ON, 2:OFF, 3:OFF, 4:OFF, 5:OFF, 6:ON, 7:OFF, 8:OFF, 9:OFF, 10:ON
Initiating the K6-III cache (K6DOS.SYS)
device=k6dos.sys -6.0 -wcg
This sets the multiplier to 6.0x which is what we want for a 400 Mhz K6-III, enables write allocation (which is what we want), and optionally GEWBED which only advanced GPUs will make use of. If you system doesn't need GEWBED it doesn't hurt to leave it on. Remember to change the path to wherever you're placing K6DOS.SYS.
PowerLeap did offer a (now long lost) utility to initiate the K6 cache, but it probably wasn't as elaborate as K6DOS.SYS which unloads itself from memory soon sa the operate is finished, and probably didn't offer as many configuration options.
300PL Fan Assembly Mod
All 300PLs sharing the 6562 case use a drop in fan assembly (which contains the LEDs and other things). It is possible to pull out the 92mm Nidec fan, cut off the wires, and solder on a 3-pin fan connector. Then you can put in any desired 92mm fan you like (use a high quality fan such as a Noctua 92mm with vortex notches to make the white noise more pleasing). This is especially useful if the fan on your assembly has been ran to death where the point the fan is emitting irritating sounds.
300PL Audio Enhancement Modification
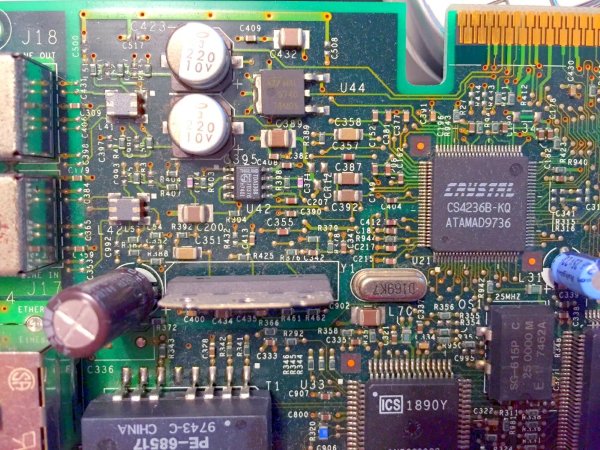
The 300PL 65xx audio output section
The 300PL 65xx uses two amplifiers:
TDA7056B to control the line-in
TDA1308 to control the stereo line-out
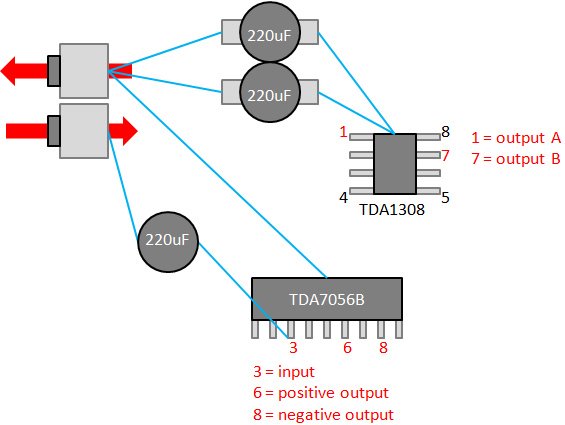
Unfortunately IBM (like virtually all manufacturers that implement audio) used polarized capacitors. Taking a look at the TDA7056B and TDA1308 reveals that the amplifiers require bipolar capacitors. We'll need to remove all three capacitors and replace them with bipolars, or create our own bipolars. There is one through-hole capacitor for the TDA7056B, and there are two surface mount capacitors for the main stereo output on TDA1308. I find the best way to remove the surface mount capacitors is taking a pair of lead snips and cut the capacitor from the base; this will separate the capacitor from the base and allow us to gain access to the pads. Once the capacitor is removed we can heat up an iron and gently remove the residual leads left stuck in the pads.
--> TDA1308 Datasheet
--> TDA7056B Datasheet
Purchasing a bipolar electroltyic capacitor can be difficult and/or expensive-- and since I did not have any 220uF bipolar capacitors on hand, I went ahead and fabricated my own. To do this we'll need a capacitor that's at least double in capacitance as when we run them in a bipolar series the capacitance will be reduced (roughly by half). I chose two 470uF capacitors that I had and soldered the cathodes (negative side) together at the center, giving us a ballpark 235 uF. Since it's most likely *impossible* to purchase a surface mount bipolar electrolytic capacitor, I bent the legs at a 90 degree angle and soldered them to the surface mount pads; this actually makes removal quite easy than if we used a 'proper' surface mount capacitor anyways. Soldering the through hole capacitor was easy. Here was the result:
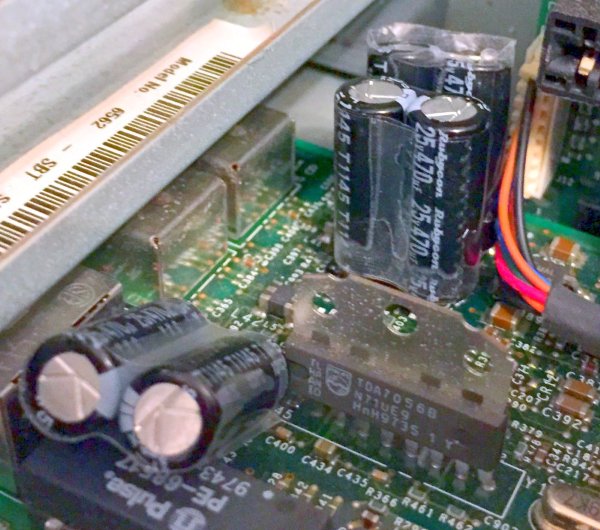
NOTE: Make sure you have clearance for the bottom ISA slot if you use it. The capacitors I used were fairly tall, I would suggest using ones with less height.